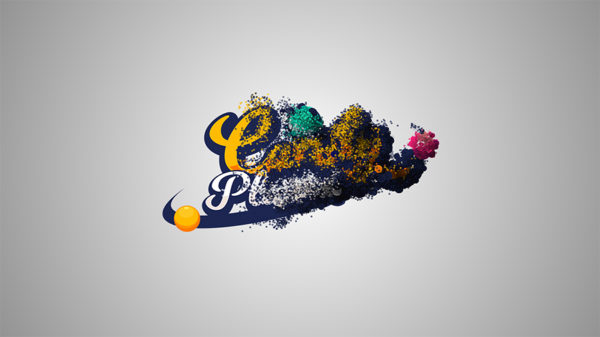
Hello dear friends, a lot of you have requested lately tutorials on third-party plugins, and most of the time on Particular. Others have requested tutorials on kinetic typographies, so, I decided to put them together in a single video, that’s why today you can learn how to create a particle kinetic text animation.
Download the Projec Files Subscribe to my Channel Download the Template
Particle Kinetic Text Animation Tutorial Transcript
Hey, welcome back to my new video. This is EZ tutorials, and for those of you who are the first time in this channel, please consider subscribing. Today we’ll be creating a particle kinetic text animation.
Before we start, I’d like to invite you to support me on Patreon. You can also get access to all my premium content.
In this tutorial will be using the EZ Tools script, which is free to download. So let’s start. Import the files you need into After Effects. You can download the project files and the template separately, this way you will be able to create this beautiful particle kinetic text animation even if you don’t want to download my template. You can find the links to the project files, and to the example animation template in the description.
Create a new composition and name it: text animation. For this example, I’m using a FULL HD 1080 pixels preset, with 30 frames per second, and 6 seconds long, but you can make it as long as you need.
Create another composition, and name it typography. Use the same length and settings as before.
Select the horizontal type tool, and start writing your texts. In this example, I will use 3 texts. Also, I am using the Bebas Neue font family, which is free to download, but you can use any other font. Place your texts in their final places, you can even use different sizes, or rotate them. Be creative. Now, it’s important to place them in the exact reveal order, from top to bottom, then, select each text layer, and pre-compose it. Name the first one Text 1, the second one Text 2, and so on… Move to 2 seconds, select all the text layers, split them, then, delete the newly created compositions.
Offset your texts layer as much as you need for your animation. In this example I will make them start from the 15th frame, then, overlap them 15 frames each one, but you can play with the start times until it fits your needs. When you are done, select the typography composition from here, and duplicate it.
Enter the new composition and follow my steps. Place your playhead at the beginning of your first text layer, select it, move 15 frames forward, and change its start time, move another 15 frames forward, split your layer, and delete the new one. Repeat this actions with each text layer you have. All these pieces of layers will serve as emitters for the particles, that’s why is very important to respect the timings I gave you.
Go to your typography composition, select the text 1 layer, and apply the fast blur effect to it. Move to 15 frames, where this layer starts, create a keyframe on blurriness, and change its value to 30. Move 20 frames forward, and change the value to 2. Move back to 15 frames, open the opacity options, create a keyframe, and change the value to 0%. Move 20 frames forward, and change the value to 100%. Move another 25 frames, and create a hold keyframe, then move 15 frames more, and change the opacity value to 0%.
Search for turbulent displace, and apply it. Change the amount to 100, and create a keyframe, move 40 frames back, and change the amount to 0. Change the size to 6, and the displacement to twist. Search for fractal noise, and apply it. Change the contrast to 450, create a keyframe on brightness, and change its value to 350, then, move 40 frames forward, and change the value to -260. Click transform, and change the scale to 23.
Your animation should look like this. Now place your playhead at the beginning of your second text layer, select all the effects from your Text 1 layer, copy them, select your Text 2 layer, and paste them. Move at the beginning of your text 3 layer, select it and paste the effects and so on.
Select the opacity from your text 2 layer, copy it, and paste it to each text layer, the same as you did with the effects. Remember that is very important to be at the beginning of your layer before pasting the effects or the opacity.
This was the most difficult part of our tutorial. Your text animation should look like this now. Go to your text animation composition, and bring the Typography and Typography 2 layers into it. Make them 3D, make the Typography 2 layer invisible, open the opacity of your Typography layer, and change its value to 80%.
Create a new black solid, Place it between your Typography layers, and rename it Particle 1. Now, will have to use the Trapcode Particular plug-in, which is a paid plugin as you know. For those who don’t have it yet, go to the Red Giant official website, and download the trial version. You can find the link in the description.
Search for particular, and apply it to your solid layer. Open the emitter, change the number of particles per second to 100000, change the emitter type to box, the emitter size xyz to 0, then, change the emitter type to layer. Open the layer emitter, and change the layer to Typography 2, and the layer sampling to particle birth time. Change the velocity to 15, the velocity random to 35%, and the velocity distribution to 2.
Open the particle, change the life to 2 seconds, the life random to 30%, the size to 3, and the size random to 45%. Open size over life, apply this preset, then fill the right size like me. Open physics, click on air, and change the wind Z value to -50. This is how it looks until now.
Select the particle 1 layer, and duplicate it. On the particle 2 layer, open the emitter, and change the number of particles to 20000, and the velocity to 35. Open the particle, and change the life to 3, and the life random to 60%. Open the opacity over life, and change the graph like this. It does not have to be perfect, just make it look like a weird comb. This will create a beautiful glitter effect.
Select the particle 1 layer, and duplicate it again, On the particle 3 layer, open the emitter, and change the number of particles to 50000, and the velocity to 5. Open particle, apply this preset on the particle over life, and fill the left corner. In physics, change the wind value to 0.
Create a new composition, and name it particle kinetic typography. Use the same settings as before. Bring the background and the color palette files into your composition, then, bring the text animation layer on top of them. you can use it just like this, but to make these black marks disappear, change its blending mode to add.
If you want to color it, apply the tin effect to it, make the color palette visible, and change the white color to this color, or to any other you like more. You can delete the color palette file.
To change the color of your background, search for hue and saturation and apply it. Changing the master hue angle, you can get any color you want, but in this case, we will use a 115 degrees angle. to make your particle animation even more interesting, select the text animation composition from here and duplicate it, Open the new one, select the typography, particle 3 and particle 1 layers, and delete them, on the particle 2 layer click the effect controls panel, open the emitter, and change the random seed value, to any other value.
Go back to your particle kinetic typography composition, bring the text animation 2 comp here, and place it between the other 2 layers, and you are done. Let’s see the final result.
I hope you enjoyed this tutorial on how to create a particle kinetic text animation in After Effects. Don’t forget to subscribe, hit the like button and comment. It would be great to know your opinions on my tutorials. Also, you can make requests for new tutorials, on interesting effects or animations that you would like to learn. See you soon!


