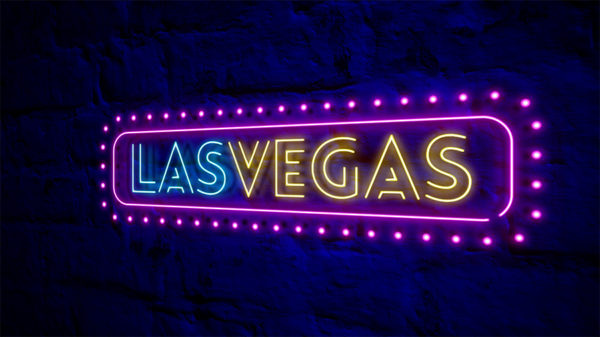
Hello friends, today I’d like to show you the easiest way (in my opinion) to create a neon text animation without any plugins, just build-in effects. As you will see in the video, the text is surrounded by a nice transparent tube which gives the appearance of a neon tube.
Download the Projec Files Subscribe to my Channel Download the Template
Neon Text Animation Tutorial Transcript
Hey, welcome back to my new video. This is EZ tutorials, and for those of you who are the first time in this channel, please consider subscribing. Today we’ll be creating a beautiful neon text animation.
Before we start, I’d like to invite you to support me on Patreon. You can also get access to all my premium content. In this tutorial will be using the easy Tools script, which is free to download. You can get it, by clicking the link from the upper right corner of the screen. So let’s start.
Import the files you need into After Effects. You can download the project files and the template separately, this way you will be able to create this amazing neon text animation even if you don’t want to download my template. You can find the link in the description.
Create a new composition and name it: neon text animation. I’m using a FULL HD 1080 pixels preset, with 30 frames per second, and 5 seconds long.
Create a new black solid and name it background. Apply the gradient ramp effect to it. Bring the color palette file into your composition, select the background, go to your effect controls panel, change this value to 540, this one to 2500, the ramp scatter to 500, the ramp shape to radial ramp, change the start color to this dark blue color, and the end color to black.
Grab your horizontal type tool, and start typing your text. I’m using the Gotham Thin font, which is free to download, but you can use any other font as long as it’s thin like this one.
Align your text to the center, select the text and the color palette layers, pre-compose them, and name the new composition text.
Open the text composition, select the text layer, then click layer, auto-trace. Let the settings as they are, and click ok. This will automatically create masks from the text layer. Make your text layer invisible for now, search for stroke, take the one from the generate section, an apply it to your auto-traced layer.
Change the paint style to reveal original image, check the all masks box, change the brush size to 5, or as big as you need to fill the entire mask, if you use a different font, then, alt-click the end stopwatch, and write this expression:
wiggle (5,100)
and click away to save it. The expression will create this flicker effect.
Apply the gradient ramp effect to your auto-traced layer, change the start color to this color, and the end color to this one. Of course, you can use your own colors if you want. Delete the color palette file, make the text layer visible again, and bring it to the top.
Search for CC Vector Blur, and apply it, change the amount to -80, and the ridge smoothness to 15. This will create a nice tube in the shape of your text layer.
Go back to your neon logo animation composition, search for fast box blur, and apply it to your text layer. If you look closer, the tube is a little pixelized on the edge, that’s why will change the blur radius and the iteration values to 1. Search for auto contrast, and apply it. Change the black clip to 10%, and the white clip to 2%.
Create a new adjustment layer, apply the glow effect to it, change the glow radius to 25, apply auto contrast to this layer too, change the black clip to 10%, and the white clip to 1.5%.
Bring the sound effects file into your neon text animation composition, and you are done. Let’s check the final result.
I hope you enjoyed this tutorial on how to create a neon text animation in After Effects. Don’t forget to subscribe, hit the like button and comment. It would be great to know your opinions on my tutorials. Also, you can make requests for new tutorials, on interesting effects or animations that you would like to learn. See you soon!


